Polyballs

Polyballs are beads of paint or finish that protrude from cracks in the floor when the moisture content (MC) of the wood rises, causing the cracks to close up. A paint polyball is a serious problem, as it can be smeared over the rest of the floor – potentially requiring screening or even recoating. Polyballs typically occur in the spring on jobs that were completed the previous winter. Here’s why:

  • Wood furnished from the north in winter is typically supplied at low moisture content. It is milled at around 6% MC and stored at about the same.
  • During winter, even in the south, humidity is at its lowest. Couple this with possible heating at the facility and moisture content can be even lower.
  • If the floor is laid and finished at this low moisture content, there will be considerable expansion in the spring during higher humidity. This can cause great compression of any paint or finish in the cracks of the floor.
  • Paint and finish that accumulate in the cracks of the floor are denied the oxygen required for curing, and could be soft (semi-solid) when the spring expansion occurs. Facility owners and operators may be resistant to maintaining proper temperature and humidity in their facilities due to the high cost of air conditioning. Therefore, we must estimate the worst-case temperature and humidity as an acclimation condition. (On the other hand, floors laid in spring and summer will acclimate to a higher, more representative MC, thereby lessening the problem.)

First, we must establish or estimate the highest moisture content (MC) of the year for the floor to be installed. Use the chart NWFA (water and wood) Handbook chart to estimate the normal MC of the wood, based on temperatures and relative humidity (RH).

Consider an example of predominant winter conditions of 50°F and 25% RH. This is when the floor is to be laid and finished. For this same facility, we can project a spring or summer condition of 70°F and 75% RH. Refer to the chart and you will see a moisture content change from 5.5% to 14.4% or a change of 8.9%! This translates into a dimensional change of 0.70″ across ten 2¼” boards (8.9 x 10 x 2.25″ x .00353). (Change in MC x # of boards x board width x expansion factor for maple).

Of course, this dimension increase is not possible, and is translated into extreme pressure between boards – the type of pressure that causes polyballs. If this floor had been laid and finished at a moisture content closer to the worst case of 14.4, there would have been little expansion and no polyballs.

To ensure polyballs do not ever happen, pay close attention to this winter moisture content problem of both the subfloor and the flooring. When moisture content is low, it must be raised through the use of humidifiers or other means.

To check moisture content without a moisture meter, or if you question the meter reading, assemble ten boards and measure overall width. These boards were milled at 6%. For every 1% of moisture content over that at which it was milled, these ten boards will grow in width about an eighth of an inch. Use this guide to establish the proper moisture content. If there are open cracks in the floor, assume low moisture content. Increase the moisture content before applying the finish.

As an additional measure to prevent polyballs, we recommend that multiple layers of paint NOT be used. There is a new masking system that allows the use of only one layer of paint, even on logos. As an example, if you were going to letter a school name on a border using this new system, you would paint the letters first. Then a computer-generated mask is placed over the letters and the border is painted. This actually leaves a small amount of wood showing around the perimeter and the inside of the letters, which looks more professional.

When polyballs do crop up, get to them QUICKLY. Oftentimes, these balls can be wiped up with mineral spirits if they are still wet. If they have become hard, a straight edge or a drywall knife can be used to break them off. Train your local maintenance personnel on how to deal with them and the problem will not be severe.

Everyone’s warranty should require that the facility owner maintain the proper temperature and humidity conditions in any facility with a wood floor. The consequences of not doing so (i.e. polyballs, cupping, etc.) should be clearly explained. This will at least give you a point of negotiation when dealing with the problem.

Screen and Recoat

Clean the floor with undiluted PoloPlaz Tie Tack. Normal tacking with this solution on a towel is sufficient. However, any concentrated areas of contamination can also be buffed with solution and a white pad – but do not apply excessive liquid on the floor. This cleaning procedure reduces the risk of spreading contaminates throughout the floor during the screening process.

Screen the entire floor with a 120-grit screen, changing as necessary. A floor is properly screened when it is thoroughly deglossed. A maroon pad may be used after screening to reduce the presence of any swirl marks that might show up in the finish coats.

Vacuum the floor thoroughly and clean peripheral dust so it won’t settle back on the wet finish. Using only water and clean towels, tack multiple times until the entire floor is clean (dark towels make it easier to see dirt that is collected from the floor). Allow the floor to dry completely after tacking, usually 30-45 minutes.

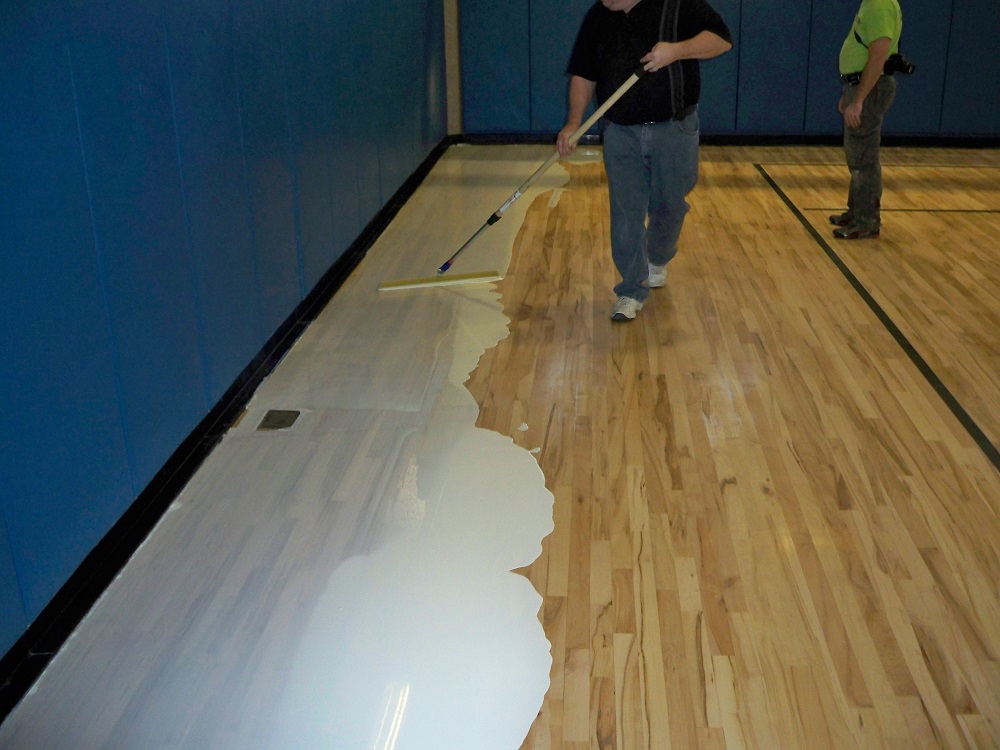
Turn off all airflow in the gym. If the HVAC cannot be turned off, block all intake ducts so airflow is reduced to an absolute minimum. Apply the first coat of Express or Dominator with an EZWay, lambs wool block or T-bar at 500 square feet per gallon. When using an EZWay, have a partner follow directly behind you with a lambs wool or T-bar to smooth out any harsh applicator lines.

Allow to dry for 4-6 hours. If within 24 hours, the second coat of finish may be applied without abrading the first coat. Please use your own discretion with this “24 hour rule,” as high temperatures and low humidity will shrink that time window. If abrasion is needed within 24 hours, screen with used 150-grit screens. If longer than 24 hours, used 120-grit or new 150-grit screens may be needed.

When using Express or Dominator, plan on two coats. Stay off the floor for two days and resume play after 72 hours. Install walk-off mats at all entrances and exits. Do not allow street shoes on the floor. Clean daily with PoloPlaz Hardwood Floor Cleaner and weekly with Tie Tack. Do not use automatic floor scrubbers, as this will void the warranty on your floor.

Panelization and Sidebonding

Sidebonding typically occurs when certain waterborne finishes or sealers flow between the sides of boards and glues them together. When several boards are bonded together they form into one large slab or “panel” of wood. This is referred to as panelization.

Panelization has been seen with several types of finishes, but is most prominent with waterbornes. Their high strength causes these products to act as particularly strong glue. These products also have very low viscosities, making it easier for them to flow into and through cracks.

As the humidity of the environment fluctuates, the wood will expand and contract in response to changes in its moisture content. Humidity fluctuations of 15% or more can cause substantial movement in the gymnasium floor. Normally, this movement is distributed over hundreds of cracks between individual boards. However, when several boards are panelized together, they leave larger-than-normal cracks at random spaces across the floor. The bond between boards is so strong that movement of the wood might cause a split right down the center of the board, rather than on the edges. Typically this occurs on gymnasium floors.  The floor itself can also be glued to the concrete subfloor, making movement impossible.

To minimize damage to your wood floor from panelization, be sure to:

  • Control Temperature & Humidity
    Often overlooked, controlling humidity fluctuations is undoubtedly the most direct way to control panelization by minimizing wood movement. All year long, humidity inside a facility should be maintained between 40% – 60%., and temperature should be kept between 65°F – 75°F.
  • Select the Proper Coating System
    With increasingly stringent VOC regulations, contractors are more frequently using waterborne finishes. Until recently, the use of waterborne sealers was not recommended for new floor installations.  The risk of panelization was just too great.

PoloPlaz has now developed NSB waterborne sealer which was specifically designed to eliminate damage to the wood floor as a result of panelization.  When used properly, NSB can be successfully applied on new floors and then top coated with a high-strength waterborne finish.

If a total waterborne system is necessary (including a waterborne sealer), the owner should be warned about the possibility of panelization, and how to combat it by controlling humidity.

Dry vs. Cure

Drying occurs when solvents evaporate from the surface of the film, leaving it tack free. There are four important elements of proper drying: temperature, humidity, film thickness and airflow. Temperature affects viscosity, which contributes to film thickness. Humidity affects the evaporation rate of the solvents. The amount of airflow determines how much oxygen will crosslink with the finish to initiate curing. High temperatures, low humidity, thin film thickness and adequate airflow will all expedite dry time and cure time. If these elements are not maintained properly, the finish could dry too quickly.

Curing occurs when residual solvents leave the film and it begins crosslinking with oxygen in the air to develop strength, toughness, abrasion resistance and chemical resistance. Although most finishes reach 90% cure in seven days, full cure takes up to thirty days.

Gym Maintenance

Temperature and Humidity

Temperature should be kept between 55°F-75°F. Humidity level should be kept between 35%-50% to ensure minimal wood movement.

Routine Cleaning

Dry mop the floor daily to eliminate dust buildup. As needed, tack floor with PoloPlaz Hardwood Floor Cleaner to remove perspiration, oils, spills and residue from foot traffic. Do not use dust mop treatments or floor cleaners that contain wax, paraffin, silicone and mineral oil. Do not use pre-treated dust mops. Use of these products can cause adhesion problems when recoating the floor. Dirt, sand and grit will dull and accelerate the wear of the finish. Place floor mats or rugs at all entryways, bathroom exits or other high traffic areas to remove excessive dirt or moisture. Spills or liquids on the floor should be wiped up immediately.

Power Scrubbers

Never use power scrubbers or automatic floor cleaning machines that disperse water on the floor (especially water under pressure). The use of scrubber machines will void the warranty on your floor. Power scrubbers were designed for other surfaces, such as terrazzo and vinyl floors. Even the softest brushes will scratch and dull the finish. The chemicals typically used in these machines are too aggressive for wood and finishes. The machine’s liquid and scrubbing action can cup the floor, and pull paint and finish from the wood.

Floor Covers and Mats

Gym floor covers should never be used on a freshly finished floor until at least three weeks after the last coat of finish has been applied. For complete curing, the finish surface must be exposed to oxygen in the ambient air. Covering the floor during this process would deny the oxygen needed to complete this reaction, potentially resulting in a partially cured coating with poor physical properties. Also, it is imperative that the floor be cleaned before the cover is laid. Otherwise, any grit or dust on the floor will mar the floor when the cover is walked on or when any loads are moved on the floor. Covers should not be taped to the floors. The adhesive in most tapes will attack the finish and result in delamination.